Manage multiple lots
Intermediate10 min
What you'll do
Add more lots, and see them all side by side.
Have ready
- Each lot's address, number of spaces and hourly rate
Step 1: Add a lot
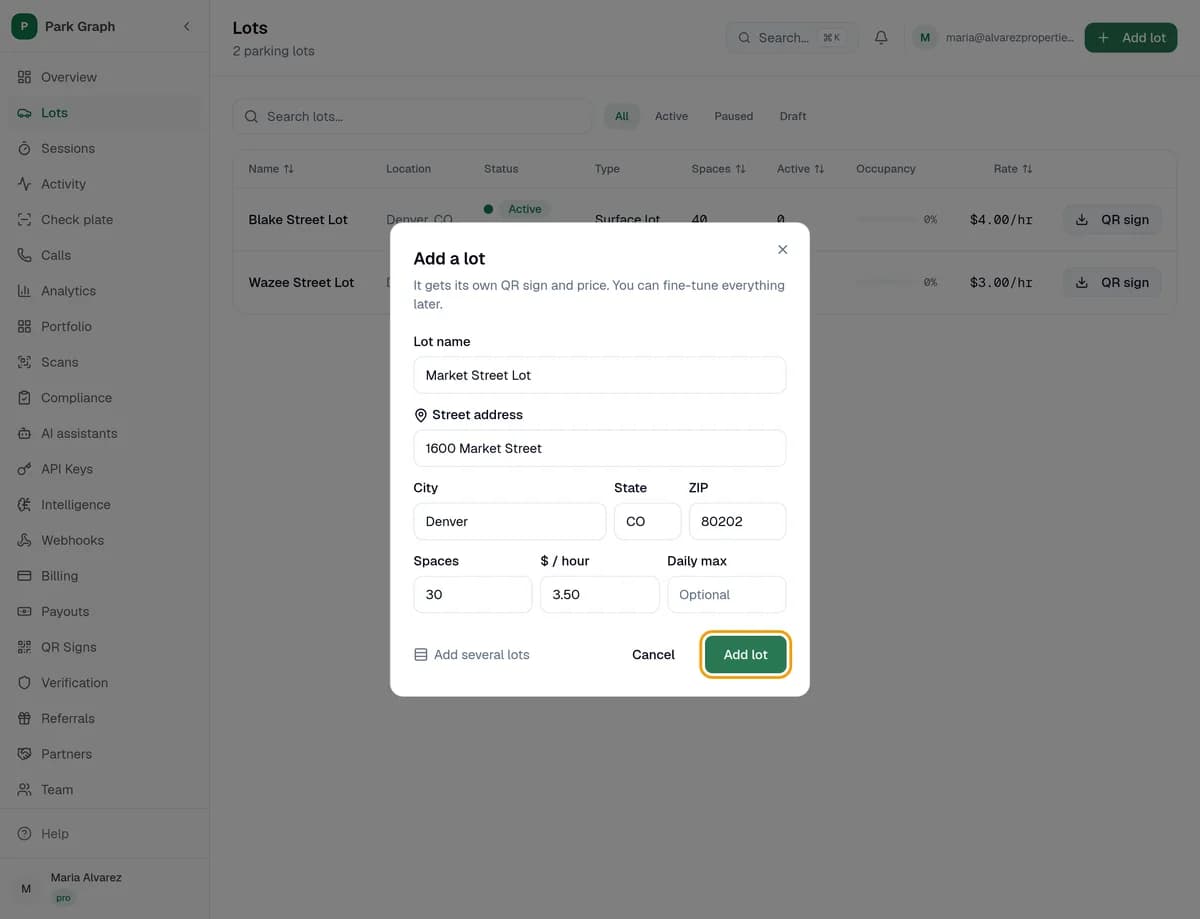
In your dashboard, click Lots, then Add lot. Type the Lot name. Start typing the Street address and pick it from the list. Enter Spaces and $ / hour, then click Add lot.
Step 2: Set up each lot
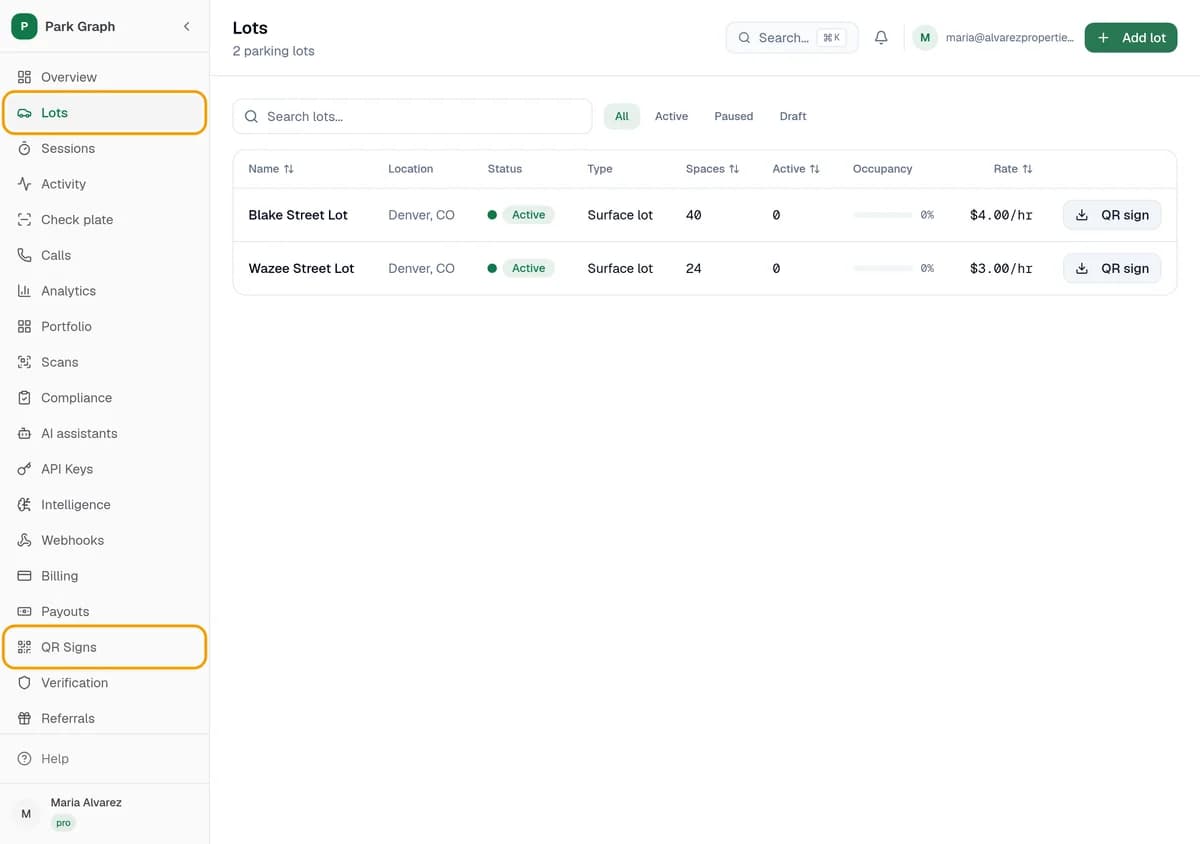
Each lot gets its own QR sign, prices and settings. Click a lot to change them. Print each lot's sign from QR Signs. All your lots pay out to the same Stripe account.
Step 3: Compare your lots
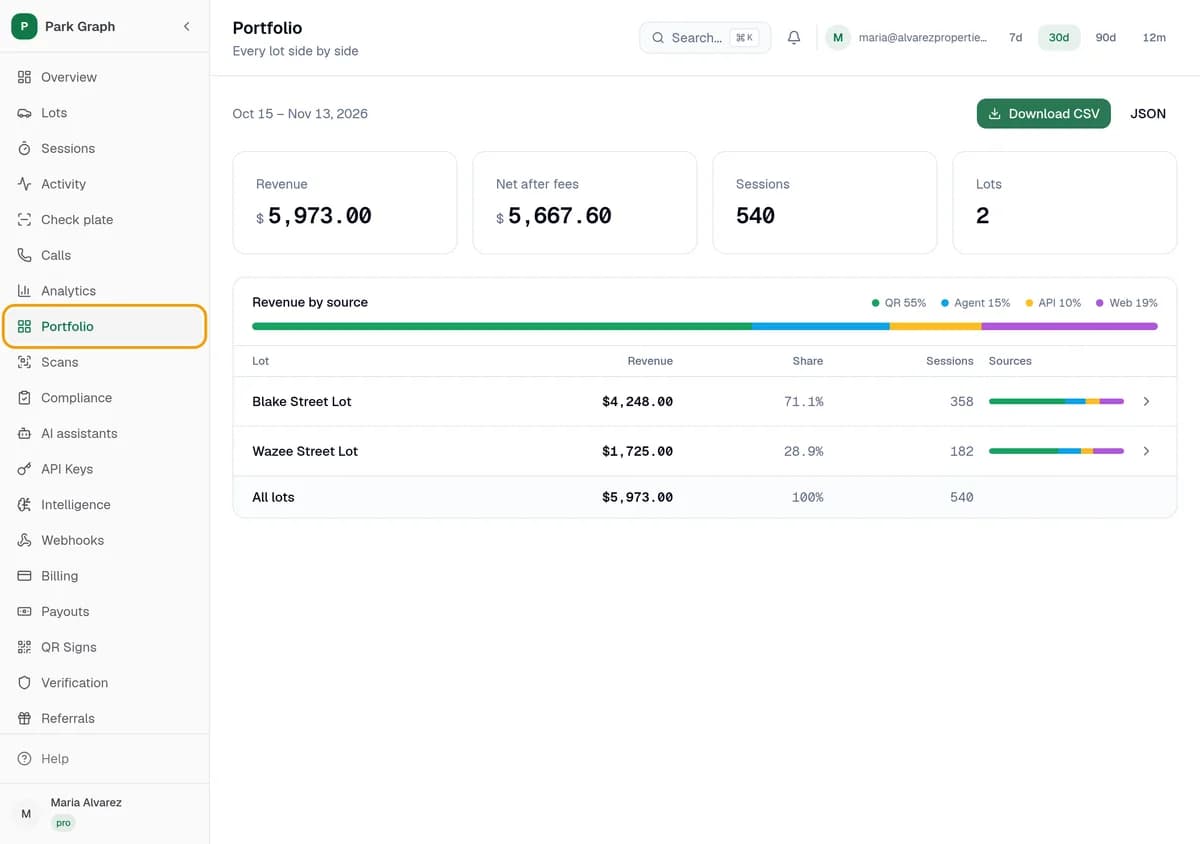
Click Portfolio to see every lot side by side: revenue, each lot's share, sessions, and how drivers paid.
You're done when
Every lot shows on Lots and in Portfolio.
Stuck?
- Can't add a fourth lot? Starter includes up to 3 lots. Pro and Enterprise have no limit.
- Want to see how full each lot is right now? Check the Occupancy column on Lots. Portfolio compares revenue and sessions.
- Drivers can't pay at your new lot yet? It goes live when your Stripe account is active.
Still stuck? Call (877) 422-PARK.